Setting up a local cluster using Minikube
Civo Academy - Setting up a local cluster using Minikube
Description
Install Minikube on your local Kubernetes cluster with our step-by-step instructions. This lesson is designed to make it easy for you to learn and develop Kubernetes for testing purposes, allowing you to have your local Kubernetes cluster up and running in no time.
Prerequisites
Before you begin installing Minikube, ensure your system meets the following requirements:
- 2 CPUs or more
- 2GB of free memory
- 20GBs of free disk space
- An active Internet connection
- A container or virtual machine manager such as Docker or VirtualBox
Installing Minikube
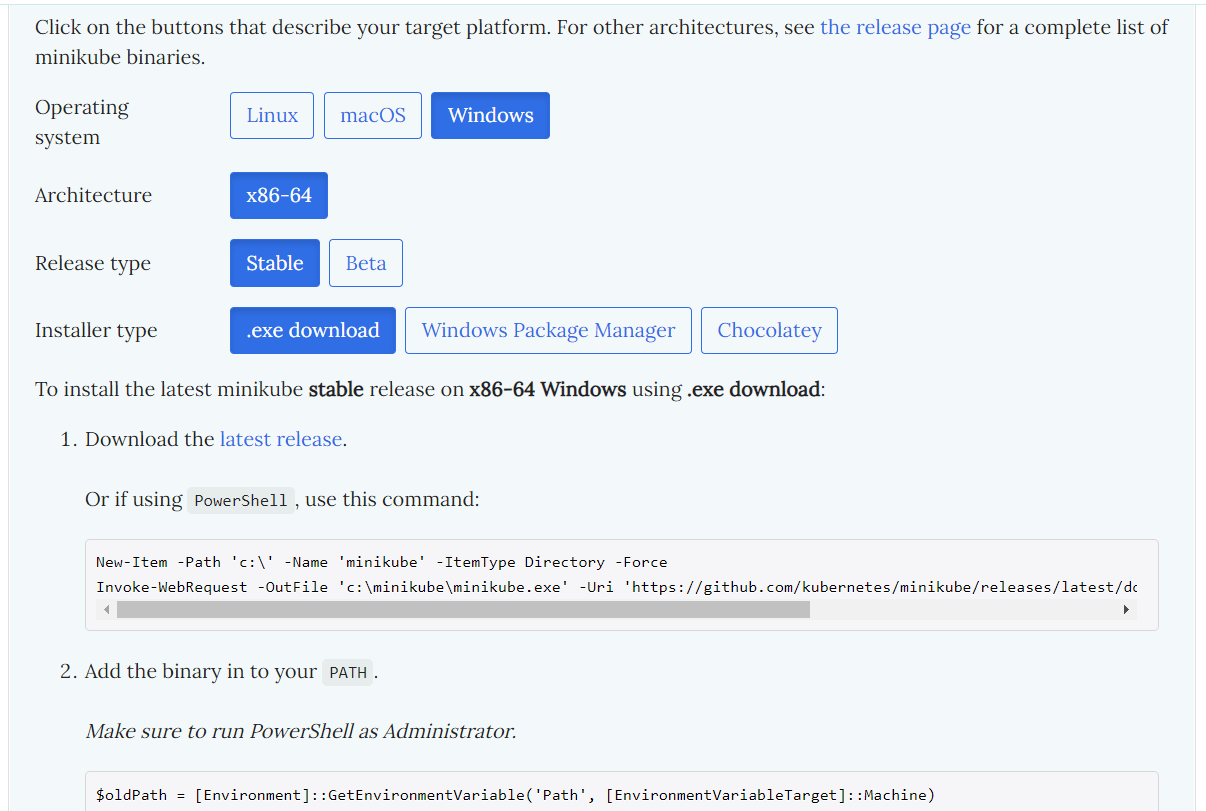
To install Minikube, navigate to the official Minikube website at https://minikube.sigs.k8s.io/docs/start/. Here, you'll find installation instructions tailored to your operating system and architecture..
For macOS on Apple silicon, you'll need to use the ARM architecture. Simply copy and execute the provided command to download and install the binary executable.
For Windows users, the process is slightly different. You'll need to download the latest release from the Minikube Windows AMD64.exe system, rename it to minikube.exe, and add it to your path. Once installed, validate the installation by running the command 'minikube version'. If it's running correctly, you're ready to spin up your cluster.
Spinning up a Kubernetes cluster using Minikube
Setting up a Kubernetes cluster using Minikube is straightforward. The creators of Minikube have simplified the process to a single command. When you run minikube start, Minikube will create a local virtual machine and deploy all necessary Kubernetes components into it. This VM will be configured with Docker and Kubernetes via a single binary known as the local Kube.
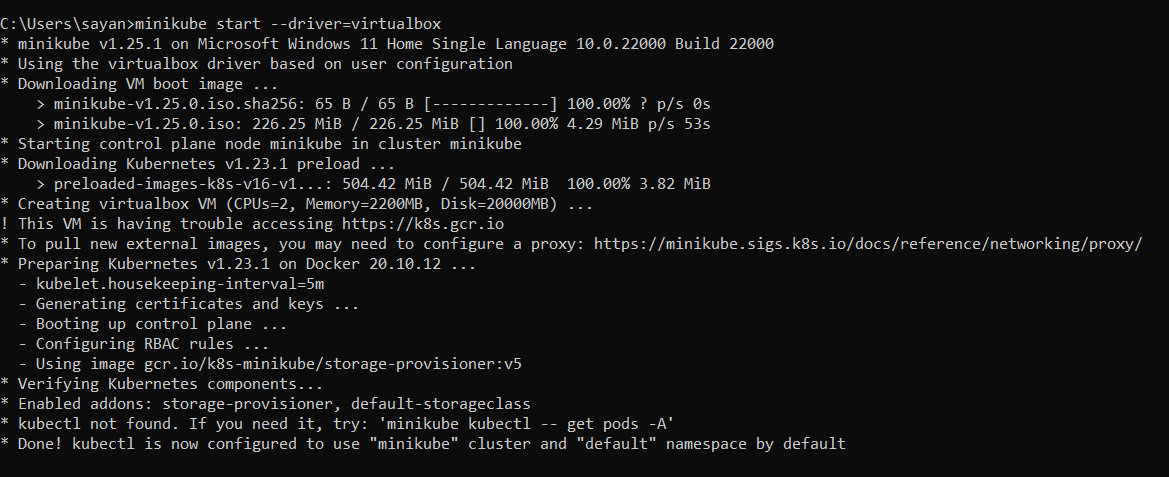
If you're using VirtualBox, you'll need to specify it as your VM driver by using the command minikube start --vm-driver=virtualbox. The minikube start command creates a new virtual machine based on the Minikube image, which includes Docker and RKP container images and a local Kube library.
For Windows users experiencing issues with VirtualBox, Hyper-V is a viable alternative. You can execute the Get-NetAdapter command in a PowerShell admin window to get things running.
Verifying your setup
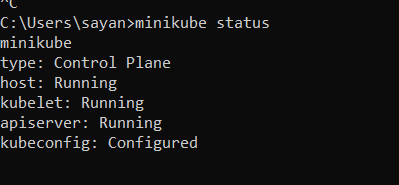
Once your Kubernetes cluster is up and running, you can verify its status using commands like `kubectl get pods` or `minikube status`. These commands will provide you with information about your cluster's configuration, the API server, kubelet, host, and control plane type.
Exploring the Minikube dashboard
Finally, explore the Kubernetes dashboard by running the command 'minikube dashboard'. This command will redirect you to a URL where you can view your Kubernetes dashboard and monitor your deployments.
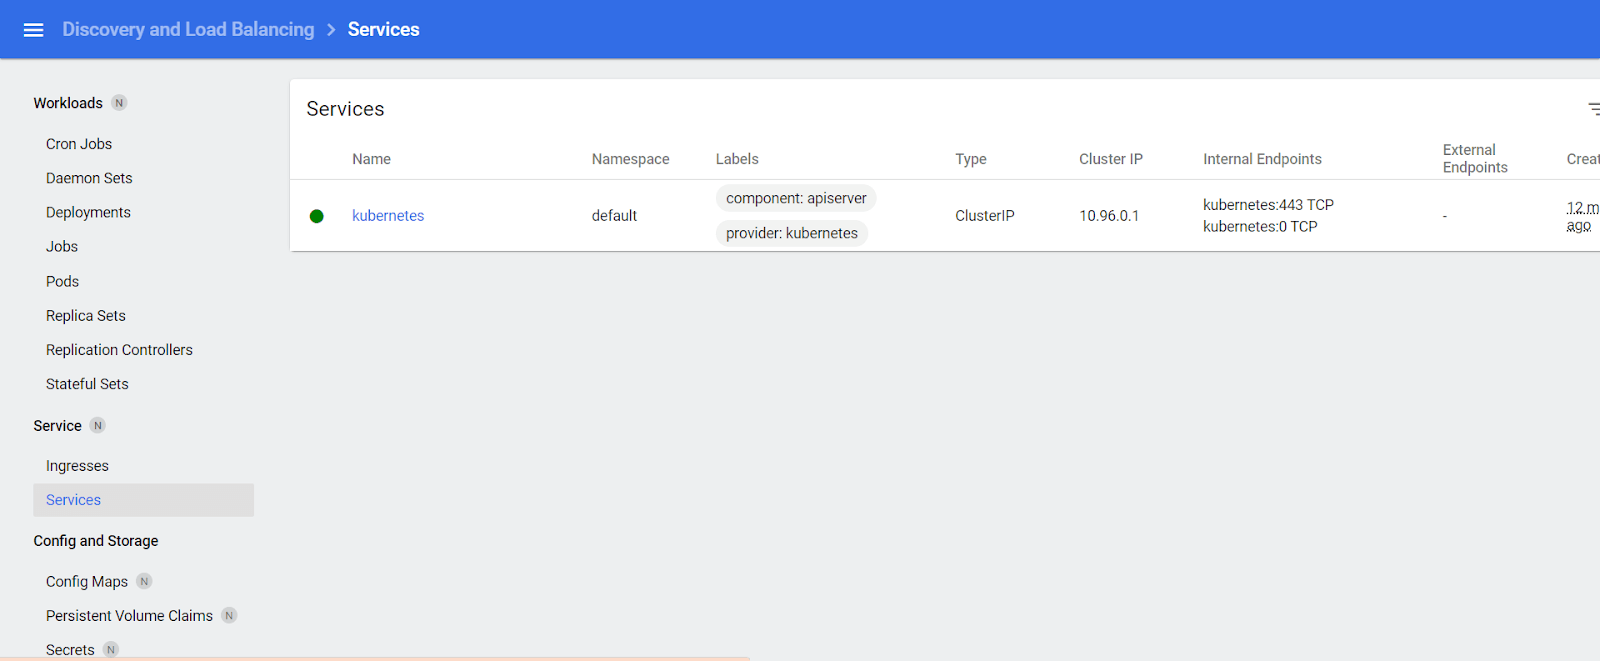
If you're a beginner, don't worry about understanding everything right away. As we delve deeper into Kubernetes components in future tutorials, the dashboard will start making much more sense.
These may also be of interest
Kubernetes 101: A comprehensive guide
Learn all about Kubernetes, including its features, benefits, and advanced topics such as networking, storage, security, and operators.

Creating a Kubernetes cluster
Creating a managed Kubernetes cluster on Civo provides you with options, from a streamlined experience to customisation of various aspects of how your cluster is set up.
Deploy your first Kubernetes application through CLI
Deploy your first Kubernetes app with ease using kubectl. This step-by-step guide provides a smooth introduction to cluster configuration, resource definition, deployment, and testing.
