Configuring and Joining Multi-Node Clusters with Kubeadm and Containerd
Civo Academy - Multi-node clusters using kubeadm + containerd
Description
The process of setting up a Kubernetes cluster with multiple nodes, which has become increasingly important in the world of cloud computing and containerization, will be demonstrated to you in this lesson. You may use all of this information to learn how to set up multi-node clusters using Kubeadm and Containerd.
What is Kubeadm?
Kubeadm is a powerful tool that allows you to set up a multi-node Kubernetes cluster in real time. It's a popular choice among developers due to its flexibility and compatibility with multiple virtual machines (VMs). Whether you're working with limited resources or using cloud-based VMs, Kubeadm is a reliable option for configuring Kubernetes master and node components.
Preparing for Kubeadm installation
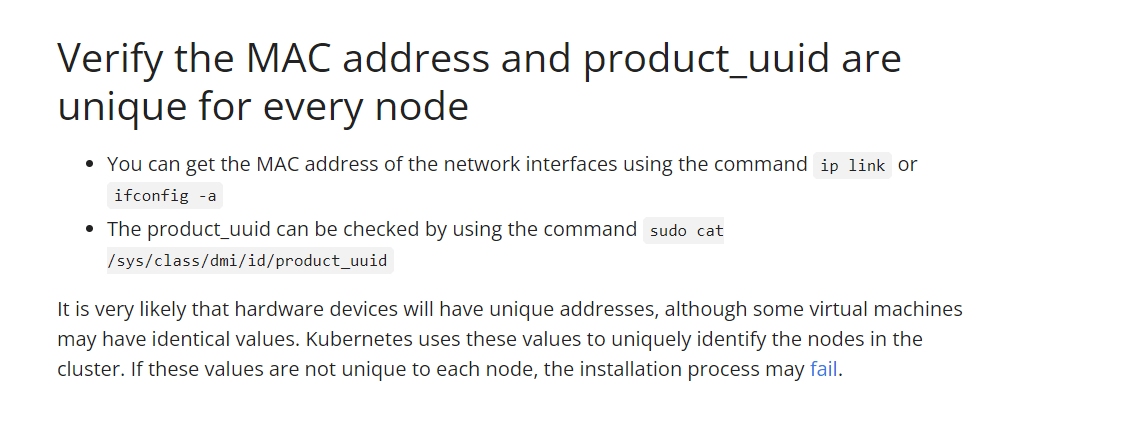
Before we dive into the installation process, let's discuss the requirements for Kubeadm. The official Kubernetes Docs website provides a list of compatible Linux hosts, such as Debian, RedHat, and Ubuntu. Each machine in your cluster should have at least 2GB of RAM and two CPUs. Full network connectivity is required between all machines in the cluster, whether on a public or private network. Unique hostnames, MAC addresses, and product_uuid are also necessary for each node.

Lastly, you can check the required ports and see the purpose of what they will be used for, and for which service they are going to be used.

Installing Kubeadm, Kubelet, and Kubectl
In this next section, we'll be installing Kubeadm, Kubelet, and Kubectl. We'll also show you how to install Containerd, a runtime that can be used alongside Docker and CRI-O. We'll be using instances on Civo for this session, demonstrating how easy it is to set up your instances on Civo. Our setup will include a control plane and two nodes, also known as a master node and two worker nodes.
Creating and accessing an instance
In the instances section of the Civo dashboard, you can easily create and manage your instances. For this example, we're creating three instances: Control-Plane, Node-1, and Node-2. Once created, you can click on an instance to view its details, including the IP address.
To access an instance, you can use the Secure Shell (SSH) protocol. SSH allows you to control your instance remotely from your local machine. Here's how you can do it:
- Open your terminal and type the following command: `ssh root@
`. Replace ` ` with the IP address of your instance. - The system will ask if you want to continue connecting. Type `yes` and press enter.
- Next, you'll be asked for a password. You can find this by clicking on the "SSH Information" button on the right-hand side of the instance details screen. Click on "View SSH Information", and you'll see your password. Note that the password is hidden by default for security reasons. To view it, click on the "Show" button.
- Copy the password and paste it into your terminal when prompted.
And that's it! You're now logged into your instance via SSH. You can now execute commands and manage your instance directly from your local machine.
Creating Containerd Configuration File
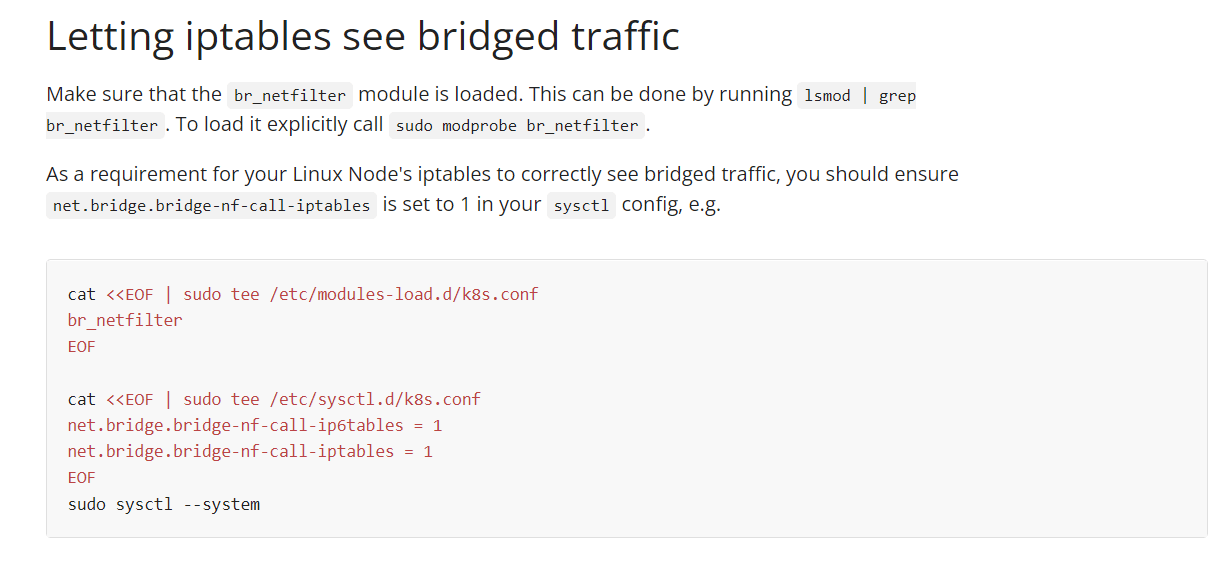
After creating the instances, the next step is to install some packages and create a Containerd configuration file on each node. This process involves instructing the node to load the overlay and the br_netfilter kernel modules and setting the system configuration for Kubernetes networking.
First, execute the following command to instruct the node to load the overlay and the br_netfilter kernel modules:
                bash
                cat <<    EOF | sudo tee /etc/modules-load.d/containerd.conf
                overlay
                br_netfilter
                EOF
You can load these modules immediately without restarting your nodes by running the following commands:
                bash
                sudo modprobe overlay
                sudo modprobe br_netfilter
Next, set the system configuration for Kubernetes networking with the following command:
                bash
                cat <<    EOF | sudo tee /etc/sysctl.d/99-kubernetes-cri.conf
                net.bridge.bridge-nf-call-iptables  = 1
                net.ipv4.ip_forward                 = 1
                net.bridge.bridge-nf-call-ip6tables = 1
                EOF
Apply these settings by executing the sysctl command on the system:
                bash
                sudo sysctl --system
Now, update the AppKit and install Containerd using the following command:
                bash
                sudo apt-get update && sudo apt-get install -y containerd
After installing Containerd, create a configuration file for it inside the /etc folder:
                bash
                sudo mkdir -p /etc/containerd
                sudo containerd config default | sudo tee /etc/containerd/config.toml
Finally, restart Containerd to ensure the new configuration file is being used:
                bash
                sudo systemctl restart containerd
Installing Dependency Packages
Before installing the Kubernetes package, we need to disable swap memory on the host system. This is because the Kubernetes scheduler determines the best available node to deploy the ports that will be created, and allowing memory swapping can lead to performance and stability issues within Kubernetes. To disable swap memory, use the following command:
                bash
                sudo swapoff -a
Next, we'll install some dependency packages. To do this, use the following command:
                bash
                sudo apt-get update && sudo apt-get install -y apt-transport-https curl
The next step is to download and add the GPG key for Google Cloud packages. You can do this with the following command:
                bash
                curl -s https://packages.cloud.google.com/apt/doc/apt-key.gpg | sudo apt-key add -
Finally, add Kubernetes to the repository list with the following command:
                bash
                cat <<    EOF | sudo tee /etc/apt/sources.list.d/kubernetes.list
                deb https://apt.kubernetes.io/ kubernetes-xenial main
                EOF
Updating Package Listings and Installing Kubernetes Packages
The next step is to update the package listings. You can do this with the following command:
                bash
                sudo apt-get update
After updating the package listings, we will install the Kubernetes package. If you're using dpkg and getting a dpkg lock message, wait for a few minutes before trying the command again.
Now, we will be installing Kubelet, Kubeadm, and Kubectl. We're installing a specific version of Kubelet, Kubeadm, and Kubectl to ensure compatibility. Use the following command to install these packages:
                bash
                sudo apt-get install -y kubelet=1.20.1-00 kubeadm=1.20.1-00 kubectl=1.20.1-00
After installing these packages, we want to prevent them from being automatically updated. This is to ensure that our Kubernetes setup remains stable and doesn't break due to incompatible updates. To turn off automatic updates for these packages, use the following command:
                bash
                sudo apt-mark hold kubelet kubeadm kubectl
With this command, the automatic updates for Kubelet, Kubeadm, and Kubectl are turned off.
Setting up Kubectl Access
The next step is to set up Kubectl access. This will allow you to interact with your Kubernetes cluster using the Kubectl command-line tool. To set up Kubectl access, follow these steps:
1. Create a directory for the Kubectl configuration file:
                bash
                mkdir -p $HOME/.kube
2. Copy the admin.conf file to your newly created directory:
                bash
                sudo cp -i /etc/kubernetes/admin.conf $HOME/.kube/config
3. Change the ownership of the copied file to the current user:
                bash
                sudo chown $(id -u):$(id -g) $HOME/.kube/config
You can test your Kubectl setup by checking its version:
                bash
                kubectl version
If Kubectl is set up correctly, this command will return the version of your Kubectl client and your Kubernetes server.
Next, we'll install the Calico network add-on. Calico provides simple, high-performance, and secure networking for Kubernetes. Many major cloud providers trust Calico for their networking needs. You can install Calico using the following command:
                bash
                kubectl apply -f https://docs.projectcalico.org/manifests/calico.yaml
To see all the components of your Kubernetes setup and their installation status, use the following command:
                bash
                kubectl get pods -n kube-system
This command will return a list of all the system pods running in your Kubernetes cluster.
Configuring the Two Worker Kubernetes Nodes
The process we've just gone through needs to be repeated on the worker nodes. However, we won't be initializing the cluster on these nodes. Instead, we'll use the join command we got during the initialization process to connect them to the control plane.
To do this, SSH into each worker node:
                bash
                ssh root@
Replace `
After logging into the worker node, repeat the previous steps to install the necessary packages and set up Kubeadm. This includes disabling swap memory, installing dependencies, downloading the GPG key, adding Kubernetes to the repository list, updating the package listings, installing Kubelet, Kubeadm, and Kubectl, and turning off automatic updates.
Joining All the Nodes Kubeadm Commands
With the necessary packages installed and Kubeadm set up on each worker node, we can now join them to the cluster. To do this, use the join command that you noted earlier:
                bash
                sudo kubeadm join [join message]
Replace [join message] with the join message you got during the initialization process. After joining, you can use the command kubectl get nodes to view the master node and worker nodes in the cluster.
                bash
                kubectl get nodes
That concludes our tutorial on configuring and joining multi-node clusters using Kubeadm and Containerd. With this knowledge, you can set up more nodes, experiment with them, and learn more about Kubernetes networking.
These may also be of interest

Creating an instance
Creating an instance on Civo requires a few specified parameters, whether you are starting the instance through the web dashboard or using one of our API tools.

Instance volumes
Volumes are flexible-size additional storage for instances.

Install / cloud-init script usage
During Civo compute instance creation there is a section where you can provide an installation script. This can prove to be very useful when you want to install certain tooling on the instance or run scripts for initial setup.
