Kubernetes is complex! The main management functions of administering a Kubernetes cluster are accessible through the command-line tool kubectl - but this too is complex and occasionally opaque. To understand how applications run on a Kubernetes cluster, we need to look under the hood. Helpfully, Octant is a tool for just that - it is an extensible management platform for your cluster that comes with highly-useful features out of the box that avoids you having to memorise esoteric terminal commands. Crucially, it does not just act as a dashboard, but as a visual complement to kubectl that shows you how various service components fit together.
This guide will look at using Octant on a Kubernetes cluster running on Civo. We will set up Kubernetes, download Octant and have a play with what it can offer, along with looking through some applications.
Set-Up
Setting up a Kubernetes cluster
Managed Kubernetes
If you are a member of Civo, you can start a Kubernetes cluster straight from your dashboard. For the purposes of following along with this guide, I recommend you create a 3-node cluster of Medium instances as in the image below:

Once your cluster is running, use the Kubeconfig download function on the cluster administration panel to download your configuration and save it as ~/.kube/config:
 This file will be read by Octant to connect to your cluster. If you do not take this step, Octant will not know where it is looking for a cluster, and error out with
 failed to init cluster client: invalid configuration: no configuration has been provided.
If you have any other configurations saved in your Kubeconfig file, make sure you keep a copy of these if you do not intend to fully overwrite your configuration.
Manual Installation of Kubernetes
If you are not a Civo user, we will need to create the cluster manually. Apply here.
For creation of the cluster, Alex Ellis has written this handy guide for quickly installing Kubernetes on your instance. Follow that guide to get up and running, and return here to set up Octant for cluster management.
Helpfully, the above guide will ensure that you will have a kubeconfig file to connect to your cluster with, so you can proceed straight to setting up Octant.
Setting up Octant
You have a cluster running, now to get Octant set up! The easiest way is to use one of the package providers appropriate for your operating system. I'm using MacOS so am using brew:
$ brew install octant
Updating Homebrew...
[...]
==> Pouring octant-0.6.0.mojave.bottle.tar.gz
?  /usr/local/Cellar/octant/0.6.0: 3 files, 51.2MB
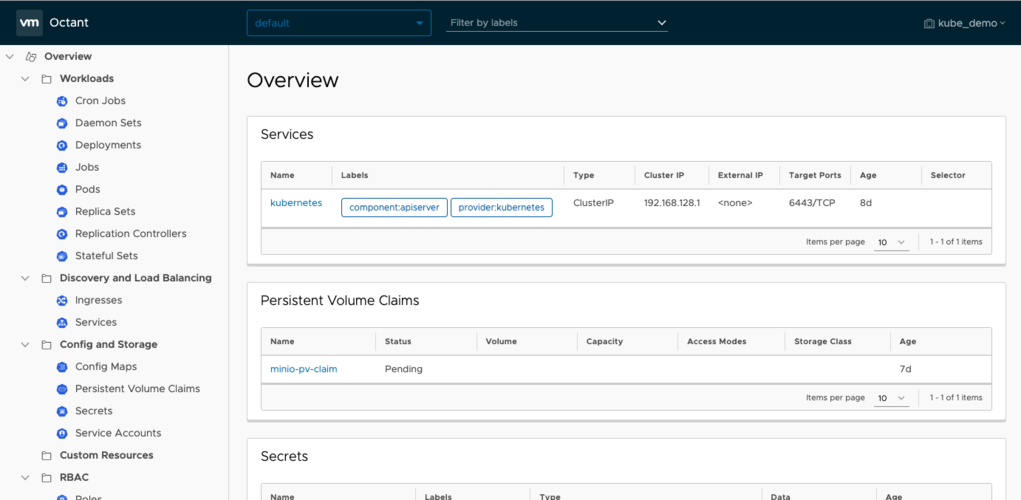
Once you have your local installation of Octant, you can simply start it by running octant. If you have followed the guide and have a healthy cluster with its configuration downloaded, you should see a browser window open that will look something like the following:

Octant Features
One of the most significant benefits of using Octant is the ability to consolidate information otherwise visible only through multiple kubectl commands. This is where the visualisation components of Octant shine: you will be able to get at-a-glance information about the health and state of your cluster, nodes and pods with just a few clicks.
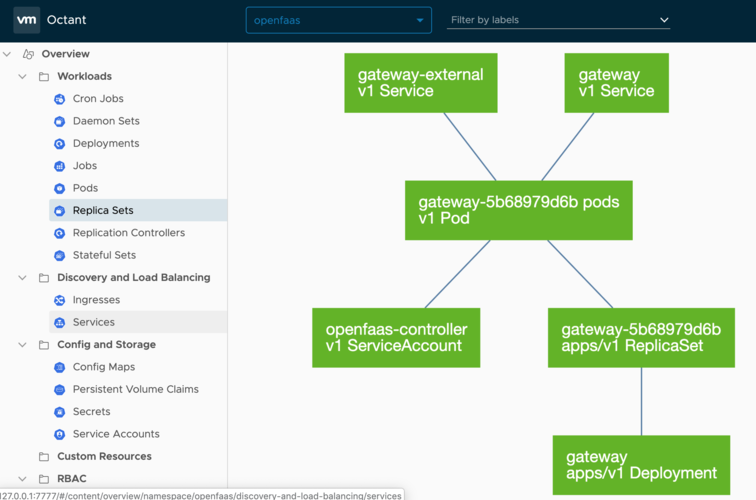
For example, I have installed OpenFaaS on my cluster following the instructions in this guide. By viewing the Octant dashboard for the cluster, we can see that after deploying a test function (in this case, mememachine from the OpenFaaS store) the service components are up and running immediately when we select "openfaas-fn" from the menu at the top, and select Replica Sets from the left-hand side, followed by one you have listed:
 Aside from the detailed Summary screen, Octant provides a Resource Viewer that allows you to view the status of any service at a glance: If service components are not healthy, you will see exactly which ones and how they affect the service, such as in this example of a function that has no endpoints available due to me having prevented a replica of the service from deploying:
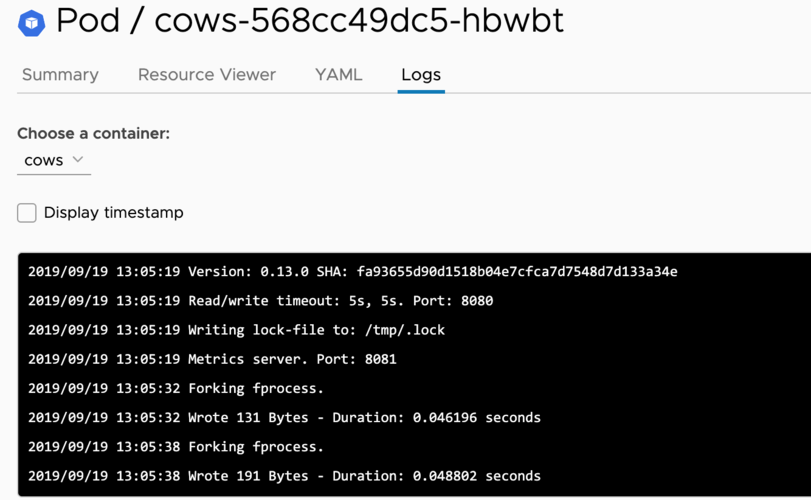
 You can view service logs for pods from within Octant, too. By navigating to the Pods menu item under Workloads and selecting the pod of your choice, you can see a Logs option that displays up-to-date information that will help you with debugging any issues your clusters may experience:

Conclusion
By following this guide, you should have deployed Octant to monitor and visualise the workings of your Kubernetes cluster. You will have seen how the status of pods is updated live, how the Resource Viewer shows the visual representation of your cluster objects, and view the logs of your pod(s).
Octant is a great tool for drilling down deeper into Kubernetes complexities that would conventionally require chaining multiple kubectl commands. It visually represents a cluster's working parts, meaning the internal structure is easier to comprehend. It is also extensible through plugins which allow you to customise your monitoring and visualisation to your exact context.
Octant is in development, which means exciting things are on the horizon. One of these is an in-built YAML editor which should allow you to edit configuration files right in Octant itself, easing administration even further.
Next Steps
Connecting other clusters to Octant
Multiple clusters are easily handled by Octant. Simply ensure that you have the config for each of your clusters merged in to your kubeconfig file and restart Octant. You will be able to change cluster context through the top-right drop-down menu.


