Twingate provides a simple, easy to use, and modern approach to securing access to private resources. Twingate enables organizations to rapidly implement a modern zero trust network that is more secure and maintainable than using a VPN. Delivered as a SaaS service, Twingate empowers IT teams to easily configure a software defined perimeter without changing their network infrastructure, whether on-prem or in the cloud.
Because it takes only a few minutes to set up, and it doesn’t require any public DNS changes or open ports, it’s ideally suited to providing private access to K8s cluster services. In this guide, we’ll cover the following steps:
- How to deploy a Twingate Connector on Civo Kubernetes via Marketplace
- Instructions on setting up your Twingate account
- How to install the Twingate Client application and access a private service in your cluster
A video walkthrough of the following steps is also available on YouTube:
Deploy a Twingate Connector on Civo Kubernetes via the Marketplace
We'll use Civo Kubernetes, which is based on K3s, to experiment with this quickly. If you don’t yet have an account, sign up here. You could also use any other Kubernetes cluster you have access to.
Create a new cluster from the UI (you can also use Civo CLI). Once ready, you should see the cluster with ready nodes.

Next, select the Twingate Connector app from the Marketplace and deploy it.
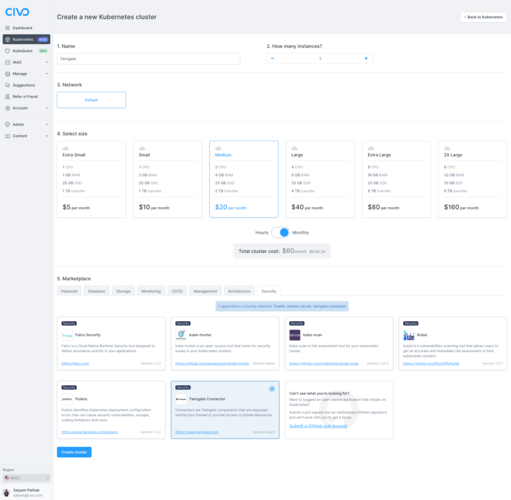
Make sure you have kubectl installed, and the kubeconfig file for your cluster downloaded so that you can run kubectl get nodes and get details of the cluster you just created:
kubectl get nodes
NAME                                STATUS   ROLES                  AGE   VERSION
k3s-twingate-fc341107-node-4c50     Ready    <none>                 68s   v1.20.2+k3s1
k3s-twingate-fc341107-master-eeb3   Ready    control-plane,master   78s   v1.20.2+k3s1
k3s-twingate-fc341107-node-3fa2     Ready    <none>                 67s   v1.20.2+k3s1
Check the Twingate connector installation
kubectl get pods
NAME                                  READY   STATUS                       RESTARTS   AGE
twingate-connector-7d77f45b9b-g5g5r   0/1     CreateContainerConfigError   0          117s
The newly installed twingate-connector pod will be in a CreateContainerConfigError error state as we need to apply a ConfigMap and Secret with configuration data. We will do this after setting up a new Twingate account.
Finally, let’s deploy a new service on the cluster called “hello-world”. This service is addressable inside the cluster with the unqualified DNS name “hello-world”, which is what we’ll use to access the service with Twingate.
You can deploy the following service to your cluster with the command kubectl apply -f hello-world.yaml after saving the deployment YAML below as hello-world.yaml.
apiVersion: v1
kind: Service
metadata:
  name: hello-world
spec:
  selector:
    app: internal-site
  ports:
    - protocol: TCP
      port: 80
---
apiVersion: apps/v1
kind: Deployment
metadata:
  name: internal-site
spec:
  replicas: 4
  selector:
    matchLabels:
      app: internal-site
  template:
    metadata:
      labels:
        app: internal-site
    spec:
      containers:
        - name: internal-site
          image: nginxdemos/hello:latest
Setting up a new Twingate account
Twingate offers a range of plans and a “no credit card” free trial to evaluate the product. For this walkthrough, you may sign up for any plan (either Teams or Business).
To create your Twingate account, go to www.twingate.com or directly to the sign up page. For later reference, you may want to make note of the general setup instructions in Twingate’s documentation.
Once you have created your account, for this walkthrough you will need to:
- Create a new Resource in Twingate with the address of the internal cluster service or pod
- Deploy a Twingate Connector to enable access to the cluster Resource
Define the hello-world cluster service as a Resource in Twingate
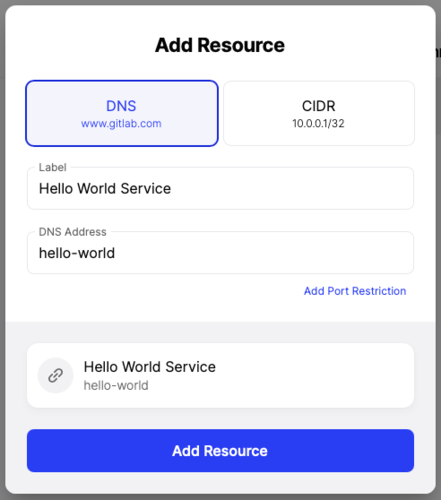
Click the Remote Network that was created when you signed up, and then choose “Add Resource”. You should see a dialog like the one below, which we’ve pre-filled with the unqualified DNS name of the service we created earlier, “hello-world”.
Deploy a new Connector
Deploying a Connector will enable access to services within the Civo K8s cluster.
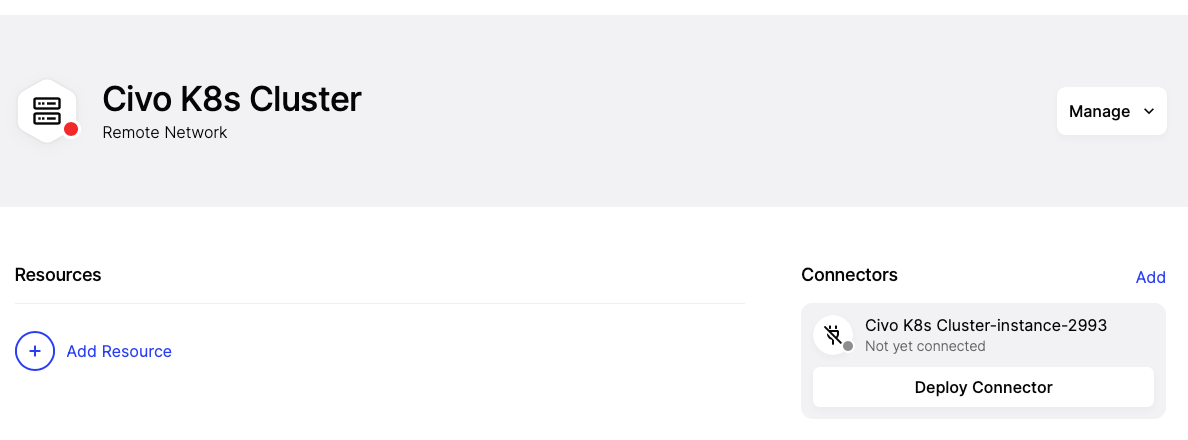
From within the Remote Network, click “add a Connector” and then “Deploy Connector”.
Select “Manual” from the list of deployment options, then “Generate tokens”.
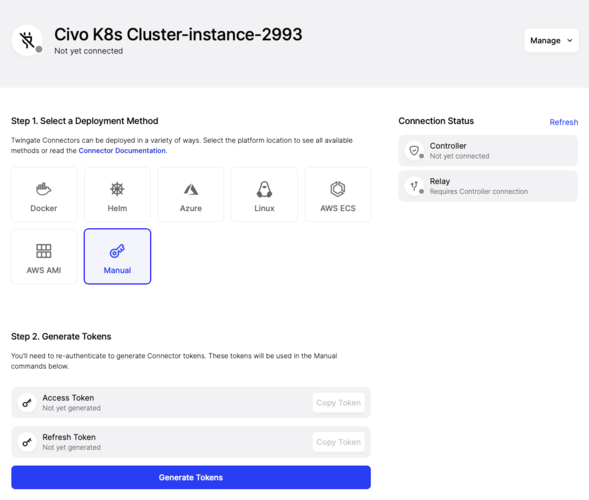
In the code example below, replace “Access Token”, “Refresh Token”, and “< civodemo >.twingate.com” with the tokens generated above and the domain name of your Twingate account in a new YAML deployment file on your computer, twingate-connector.yaml.
apiVersion: v1
kind: ConfigMap
metadata:
  name: connector
data:
  url: https://<civodemo>.twingate.com
---
apiVersion: v1
kind: Secret
type: Opaque
metadata:
  name: connector
stringData:
  accessToken: "Access Token"
  refreshToken: "Refresh Token"
Deploy the ConfigMap and Secret by running kubectl apply -f twingate-connector.yaml.
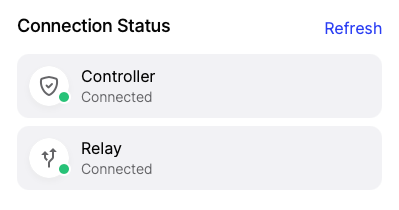
After the deployment, you should see the Connector status as connected in the Twingate Admin Console.
Install the Twingate Client application and access the private cluster service
In this section we will install the Twingate Client application and then connect to the “hello-world” resource we created above.
- Install Twingate on your computer by visiting https://get.twingate.com on any platform.
- Enter the name of your Twingate Network during initial configuration.
- Authenticate using the same credentials you used to create your Twingate account.
You are now connected to your Twingate Network, and you will be able to access the “hello-world” Resource by visiting http://hello-world in your browser.
Wrapping up
Twingate is a powerful and simple way to securely access private services in a Kubernetes (K8s or K3s) cluster without exposing those services on the public Internet.
Twingate team on Twitter at @TwingateHQ or Alex Marshall, the co-founder, at @alexmensch.
For questions about Civo or Civo Kubernetes, the team can be reached at @Civocloud and @SaiyamPathak or on the Civo community Slack.
